

Howdy! I have had a few requests for a "how to" on the mini milk carton box with the legs, so settle down for a long post and here goes!
- cut two mini milk cartons using your die and Big Shot
- cut off one complete section from each as shown below

- the centre panel has different scoring to the others (to make the spout part) but we need it to be the same, so firstly score from where the point meets the top, down to the next score line as seen below


- now score from here to either corner so you have a triangular scored shape like the others

- fold all your score lines and use your bone folder to get nice sharp creases
- using strong adhesive on the end tabs, attach the two boxes together


- to help keep your hexagon the right shape, join the bottom pieces as follows: take two opposite pieces and join them so they match perfectly and make a straight line

- do this with the other two sets of opposite pieces as well

- now cut another piece of cardstock 25.6 cm wide and height whatever you want - I used 9.5 cm for this sample
- score this piece every 4.1 cm, so at 4.1, 8.2, 12.3, 16.4, 20.5 and 24.6 - you will then have a 1 cm piece for joining
- using the 32 mm (1 1/4 inch) circle punch, punch the bottom of each section as shown below. I punched a piece of scrap paper first, folded it in half, then drew around it to give me a guide to where to punch my first one (see below), then traced around the one I had punched as a guide for the others


- don't forget to give the end piece a bit of shape too

- now decide how high up the carton you want to attach your "legs" piece. Don't put it right up to the fold as this will show too much - put it a bit below so you can hide it with your decorative panels of DSP or whatever
- put plenty of strong adhesive on the inside part - remember not to put the adhesive so far down that it goes beyond the base of your box (I drew a line at 4.5 cm so I would know where to stop!)

- begin attaching at the tab part and move around the box, adhering firmly


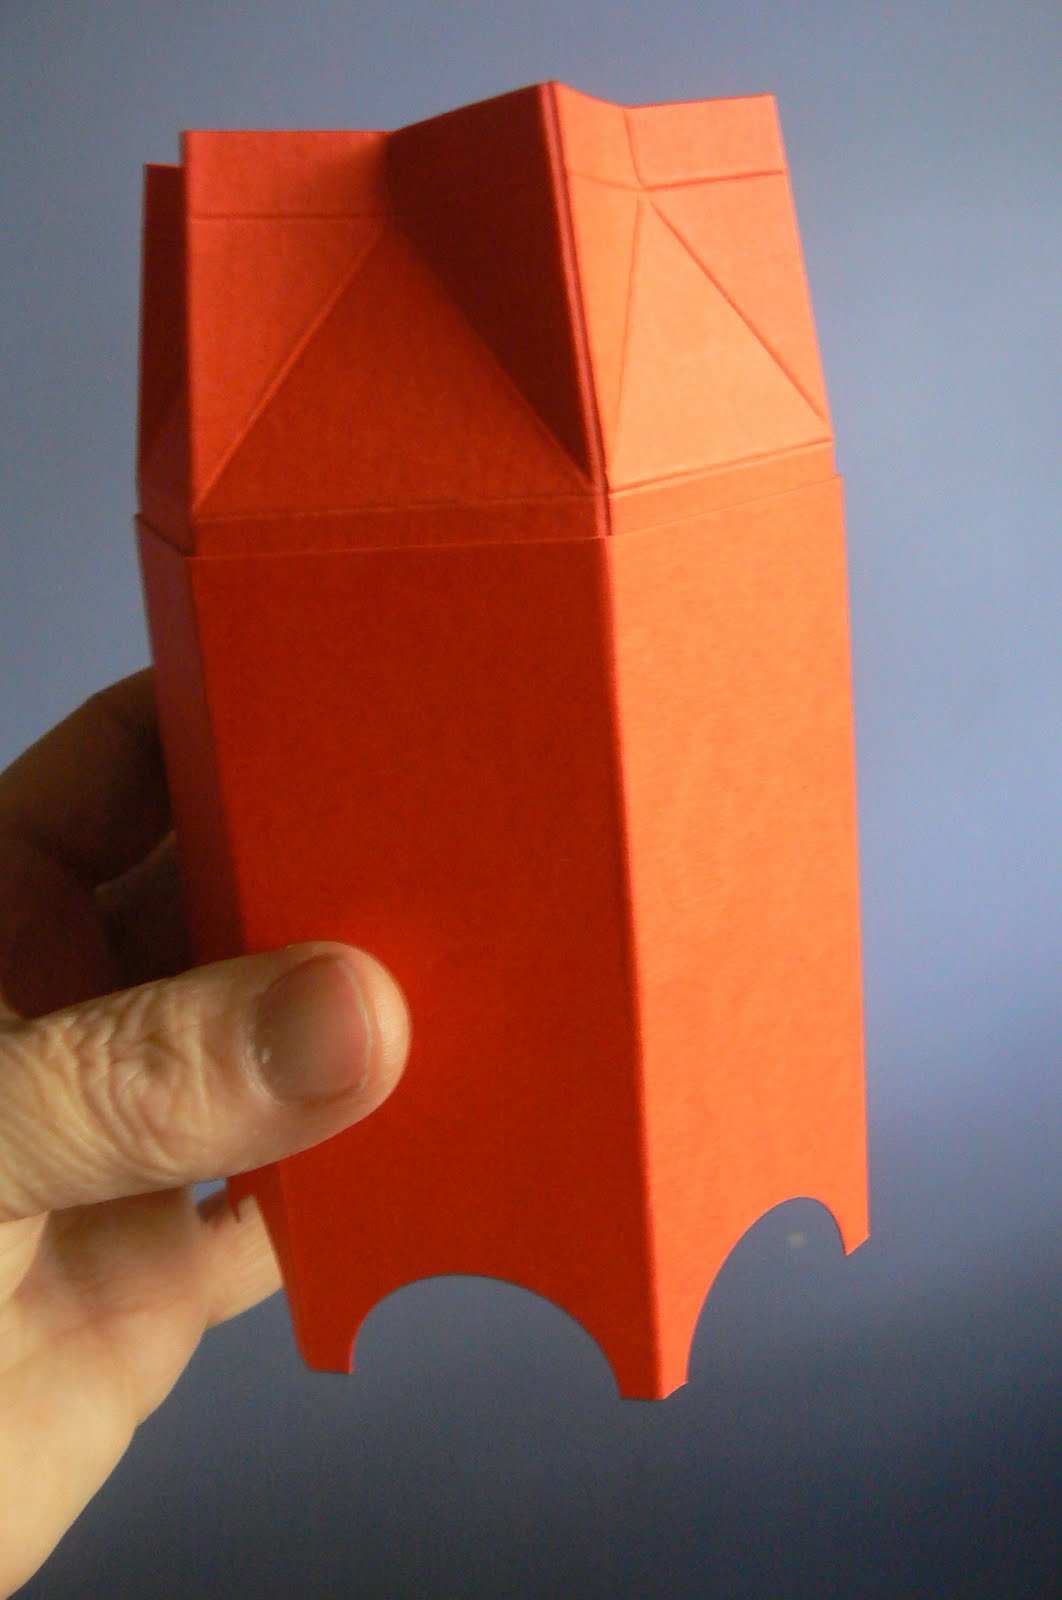
- use your crop-o-dile to punch holes in the folded top sections, then thread ribbon through to tie

- now decorate the side panels as you like - either one piece of DSP all the way around, or separate panels as per the examples below


Phew! I hope I haven't forgotten anything - have proofread this a million times!
Hope you have tons of fun making your own boxes. Many thanks to my mate Robbity for showing me how to make them in the first place!
Cheers
Kez
Edited to Add: I have since discovered that my friend got the idea for this box from two projects posted on www.creativityinprogress.com Many apologies to Sunghee for not giving her credit originally.
Cheers
Kez
Edited to Add: I have since discovered that my friend got the idea for this box from two projects posted on www.creativityinprogress.com Many apologies to Sunghee for not giving her credit originally.
Thanks Kerry for these excellent instructions. Great use of the teeny tiny milk carton die. Cheers
ReplyDeleteI hoped so much, that you would show how to make these cute boxes. But this tutorial is SUPER great, even better than I hoped. Thank you so much. Now I better put my vacuumcleaner on racing pace, so that I have time to make such a box.
ReplyDeleteGreetings from Germany
Sabine
Thanks Kerry for your fabulous tutorial. You did an excellent job for your first one.
ReplyDeleteCongratulations on your wonderful first tutorial. Your project is gorgeous! Many thanks.
ReplyDeleteWOW fantastic,love the shape and thanks for the tutorial!!!
ReplyDeletexx
That is a fabulous tutorial kez - and so easy to follow!! Now I just need to get that die and I can WOW everyones socks off. You are FABULOUS - Thanks ♥
ReplyDeleteGreat Tutorial Kez, and a fabulous box! Thanks for sharing it with us!
ReplyDeletexoxo
Excellent tutorial Kez. I knew how to make the box but for the life of me couldn't work out how you made the legs!! Thanks so much. Will now have to make some more of these boxes with legs this time. XXX
ReplyDeleteSo so clever!
ReplyDeleteWhat a WONDERFUL JOB you've done with this!!!!! AND VERY CREATIVE!!!!!!! It would take me FOREVER to come up with something like this!!!!!!! I LOVE the Asian flair too!!!!!! JUST BEAUTIFUL!!!!!! :)
ReplyDeleteBeautiful project - can't wait to make one! Thank you for taking the time to prepare the tutorial and sharing! Aloha!
ReplyDeletecela est une super bonne idée
ReplyDeletemerci pour le tuto
How absolutely wonderful this is!!! I always like seeing new ways to use the Milk Carton die and this is the nicest yet - TFS your creativity and tutorial!
ReplyDeleteOMGoodness!!! What wondeful boxes you made! Looks stunning!!!
ReplyDeleteAnd thank you for giving me the credit! you are so sweet! =)
These are so stunning, Kea! The oriental look is perfect for them! I have seen this "box" around on a couple of online tutorial blogs ... so I don't think you should stress about the origin. I think it would be hard to pin it down now! But ... congrats to sunghee for sharing this with you! :)Because you have made it your own! Oh ... and thanks for taking the time to create the tutorial. I know how long that takes! Hugs xxaxx
ReplyDeleteLove it Kerry and fabulous tutorial gonna make one!
ReplyDeleteSee next post for tutorial ravings....DOH!! Next time I won't get so darn far behind. ooxx
ReplyDeleteLooooove your first tutorial = clever bunny.
ReplyDeleteYou're soo clever Kerry, fabulous idea :)
ReplyDeleteHugs
Angie
Thanks so much for sharing this great idea with a wonderfully comprehensive tutorial. Now I can create something cute with this die. It has been sitting idle for quite a while. I love the Asian flair - just beautiful.
ReplyDeleteGreat tutorial Kerry, thanks so much for putting it together and sharing. Going to give these a go!
ReplyDeleteFabulous tutorial!!!! I can' wait to make one. Yours is just so beautiful!!! Hugs,
ReplyDeleteThese boxes are super cute- and thanks for showing us how to make one- definately on my to do list :-)
ReplyDeleteWow Kerry these are beautiful! And you did a wonderful job with the tutorial. Now I can enjoy my milk carton die because it'll make a bigger box. So cute!
ReplyDeleteWowzie! This is awesome! Very clever.
ReplyDeleteThanks for stopping by today.
Hi Kez,
ReplyDeleteI love your boxes. I wasnt going to buy this die but now I really have to....
Just found your tutorial on LNS...and this is terrific..and your first....would never have guessed.....thanks so much for sharing and taking the time to do the tutorial!!
ReplyDeleteI've just discovered this tutorial. And it is fantastic - thank-you for sharing.
ReplyDeleteGreetings from Germany
Linda
I had this one as one of my favourites but wasn't sure how to make it so thanks Kerry for your very clear instructions and great pics. can't wait to get home to my Stampin Up gear to give a go.TFS
ReplyDelete