Showing posts with label 3D. Show all posts

Sunday, April 7, 2024

No Matter What, No Matter How

It was my elder daughter's birthday yesterday and she always asks for handmade things from me - you may remember the Harry Potter piece I made her a while back. This time around it's a general reading theme, a passion I have in common with both my girls, I'm thankful to say.

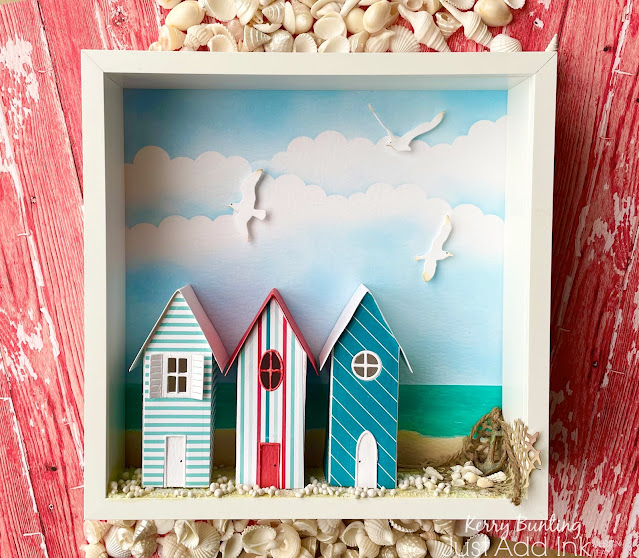
It's a shadow box and I've used a number of items from Stamperia's Vintage Library collection.


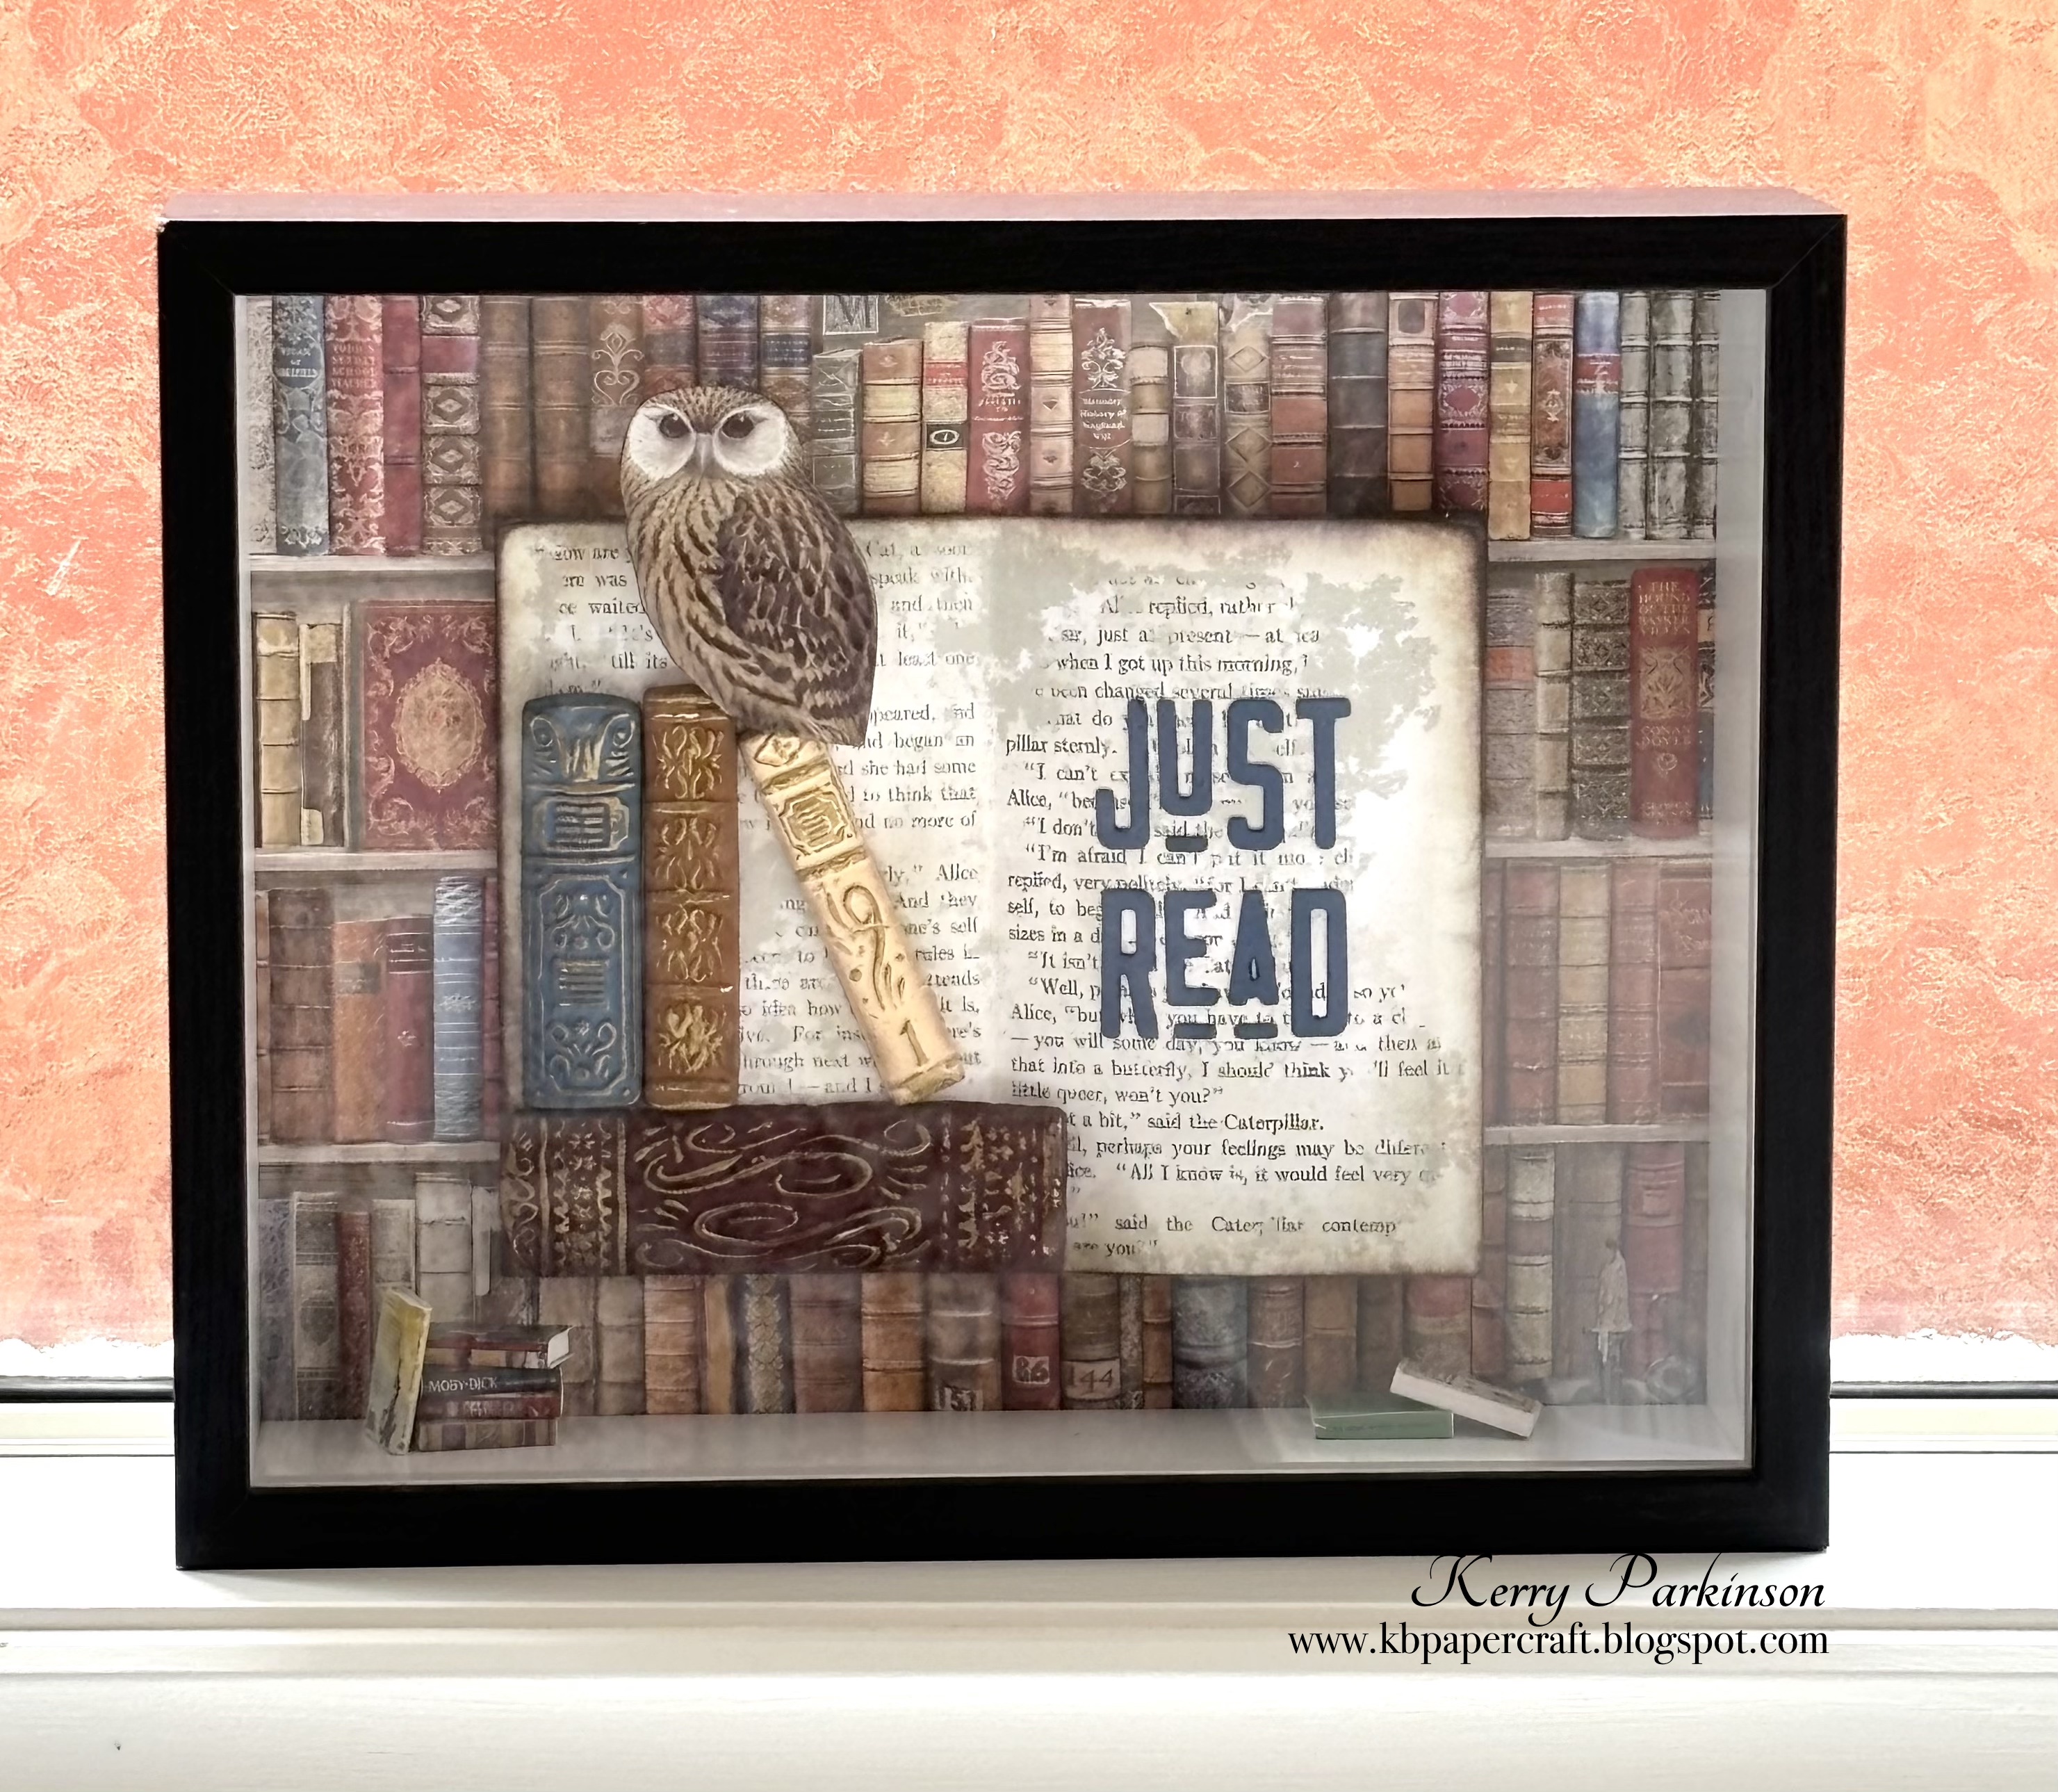
The main focus is the book pages. I used modeling clay and a mold to make the 'books', which I then painted and swiped with gold wax. I toyed with adding more to the sentiment - the words I've used for my header, in fact: no matter what, no matter how. I firmly believe it doesn't matter what you read - be it comics, graphic novels or books of any genre - and it doesn't matter how you read - physical books or e-reader - the most important thing is just that you read.


There's a few layers of pages, which I've shaped a bit and separated, though they are held in place.


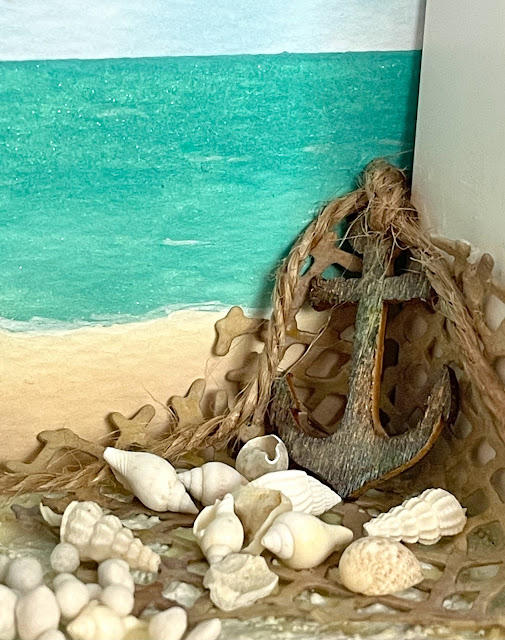
And there's a little visitor hiding in the corner.


I stuck him a bit low down, forgetting some of that corner would be obscured by the framing once it was in place, but oh well, lesson learned. He was glued on way too good to move him, lol. Luckily DD didn't mind.

If you're an avid reader too, hope you enjoy! Thanks for stopping by.

Cheers
Kerry

Friday, December 16, 2022

JAI #634 - Anything But a Card

This week at Just Add Ink we are challenging you to...


I made a scrapbook layout and an explosion box, both using beautiful Christmas papers from Mintay. Here's the scrapbook page, all ready for a photo to be slotted in:


The 'merry' isn't attached at the tops of the letters so the photo can be added later. I muted the whole page with some watered-down gesso and added a layer of vellum as well, to ensure the main focal features weren't overpowered by the bright and busy background. 


And this is when I discovered how limited my photography skills are in photographing the box, lol. I hope you'll bear with me for a number of views, beginning with the closed box.


The lid features a layered poinsettia and some die cut leaves and I wrapped some luxurious velvet ribbon around the edges.


And here's some views of it opened up.


The tree is a Tim Holtz product which comes white, so it was sprayed with distress inks. As it was a tad too tall for my box I cut it shorter and inserted it into a wood slice.  I decorated it with TH baubles and gold pearls. The 'presents' are some dice I had sitting around, lol.

Materials used: 
  • card - mossy meadow, watercolour, vellum, Time of Wonders scrapbook papers (Mintay)
  • Tim Holtz products - woodland tree, distress spray stains, baubles, wood slice, velvet trim, mini holiday greens die, aged mahogany distress paint
  • other - glue gun, gold cord, cherry cobbler thick bakers twine, gold pearls, dice, gift wrap, chipboard saying (Mintay), white gesso, sponge daubers, paintbrush, ivory pearls

Check out the amazing items my team mates created for this challenge and of course we'd love to see your creations in our gallery.

Thanks for calling in.

Cheers
Kerry

Friday, January 14, 2022

JAI #586 - Just Add a Blog Hop!

♬  Summertime and the living is easy... 


Hello and welcome to the Just Add Ink blog hop for 2022 where our theme is SUMMER. You may have just arrived from Annie's blog but if not you can start here and carry on around the hop.

The bucket and beachballs in the inspiration pic immediately made me think of trips to the beach, both as a child and as a parent, so that's what gave me my original inspiration. Then, while I was browsing ideas, I discovered that my new home town of Melbourne has 82 bathing boxes or beach huts. I've only ever seen these in the UK and Europe, so I was charmed to learn there are locals and decided my make would be an homage to these delightful constructions. And so my framed piece was born.


A weathered old anchor rests in the corner.


And the sea sparkles in the background.


I had an almost illegal amount of fun putting this together! Lol. It will be put on display in my brand new craft room and stimulate so many happy memories. 

Materials used:

  • card - distress watercolour, basic white, crumb cake, Cool Collab paper pad (MFT)
  • distress oxide inks - antique linen, frayed burlap, walnut stain, peacock feathers, tumbled glass, cracked pistachio
  • dies - Village Collection (Tim Holtz/Sizzix), Birds in Flight (Poppystamps), Under the Sea (SU)
  • other - translucent grit paste, collage medium, Art Stones (Prima), mounting strips, blending brushes, antique linen distress paint, slimline cloud edges stencil (MFT), 8"x8" dimensional frame (Nicola Spring), barn door and black distress archival inks, celestial copper ink (Delicata), chipboard anchor (Kaisercraft), twine, shells (Island Living Australia), white gel pen, clear Wink of Stella, black marker

Next up is Narelle, then you can keep hopping around until you've seen the whole team's offerings (there are 16 altogether). And, of course, it's always very much appreciated if you leave everyone some comment love. If you feel inspired to create your very own summer themed project, we'd love to see it in the JAI gallery on the blog HERE

Thanks so much for calling in!

Cheers
Kerry

Sunday, November 8, 2015

It's Beginning To Look A Lot Like...

Christmas is certainly in the air at my place lately; I've been making Christmas cards, tags and boxes. My primary school teacher daughter put the idea in my head for a Santa box and once I'd made that, I couldn't resist making more!

Here they are:


Are they adorable or what?

Materials used:
Santa - curvy keepsake box die; Big Shot; card in real red, basic black, whisper white and gold glitter; gold ribbon; black rhinestones, retired petite curvy label punch; Good Greetings stamp set
Elf - curvy keepsake box die; Big Shot; card in garden green, basic black, and white glitter; red rhinestones, retired 5 point flower punch, retired petite curvy label punch
Rudolph - curvy keepsake box die; Big Shot; card in chocolate chip, whisper white, basic black and red glitter; bird punch (wing for ears); non SU tree branch die; Dimensionals


Very simple to put together but so cute and effective - what more could you possibly want?

Thanks for calling in.

Cheers
Kez 

Monday, June 15, 2015

Paper Crafters Sampler - Incorporating Circles

This month's theme for the PCS kit is Incorporating Circles.


Here are some sneak peeks at the variety of ideas the design team came up with for this one:


Still need inspiration to use circles in your projects? Pop over to the PCS blog site HERE for more sneak peeks and of course you can always sign up for the June sampler!

This was my last month on the design team for PCS so to check out their current samplers you'll need to bookmark the blog on your computer.

Thanks for dropping by.

Cheers
Kez

Sunday, February 1, 2015

Tea Light Card

While browsing around the internet I came across a gorgeous little project by Marianne Skjelstad that I just couldn't wait to try. It's a card, gift and tag all in one and is quite easy to make.

Here's the front of my tea light card:


And the inside:


(Apart from the patterned papers I've used for this project, everything else is SU. Much as I love SU stuff (and I truly do) when it comes to pretty, feminine floral papers, they just don't do it for me. Sigh! I wish they would, I really, really do! Anyways, I've used some papers I had sitting around and you'll probably notice that I do tend to buy papers that match well with SU colours!)

On the original project, Marianne had tied some ribbon around the box on the inside (presumably to hold the tea lights in), but I attached a piece of acetate inside instead. I put the open flap of my box towards the spine of the card rather than the outside, as I find my flap is a bit loose and prone to come open and I didn't want all the candles falling out!


Materials used:

  • stamps - Butterfly Basics
  • card - crumb cake, whisper white, rose red, non SU patterned papers
  • other - deco labels framelits, Big Shot, sticky strip, butterfly thinlits die, pearls, dimensionals, acetate, scallop trim border punch, sponge dauber, white organza ribbon, bone folder

My thanks to Marianne for sharing her project and the wonderful tutorial for making it. If you'd like to make one for yourself, follow the link HERE.

Thanks for dropping by.

Cheers
Kez

Sunday, August 3, 2014

Oh, Happy Day

They've been around on the "interweb" for a while and I've had them pending in my "Gunnado" file, and now I have finally dedicated a few hours to making one!

A card-in-a-box, that is.

I have seen so many great samples that I had a hard time deciding what theme to use for my first one. Eventually I figured that I couldn't go wrong with birthday as that is the thing my ladies ask for the most. If you're familiar with my work you will know that I don't go in for very busy things, so this was a real challenge for me - to get that fine balance between not having too many empty spaces and having far too much of a good thing!

Here tis:


Materials used:
  • stamps - Just Sayin', Happy Hour, Starburst Sayings, Tag Talk, Circle of Friendship (retired)
  • card - Pacific point, pumpkin pie, daffodil delight, whisper white, brights patterned papers, Polka Dots dsp
  • other - pennant punch, starburst framelits, Big Shot, window sheets, dimensionals, label bracket punch, 1" circle punch, word bubbles framelits

And here's the back view where you would write your birthday message:


It's definitely a bit minimalist, isn't it? I'm thinking now I might need to add a few more bits ....

So, of course, having finally made one, I just had to make another with a different theme. I saw a gorgeous sample on Pinterest (which I think was made by Linda Gray) that I love and had the tools for, so I have used that as inspiration. The gorgeous new in colour Hello Honey was the perfect choice, as you'll see:


Materials used:
  • stamps - Just Buzzin' By (retired)
  • card - hello honey, basic black, whisper white, in colour patterned paper
  • other - daisy die (retired), owl punch, 3/4" circle punch, 1/2" circle punch, window sheets, Big Shot, dimensionals, hexagon embossing folder, Blendabilities, pennant punch, sponge dauber
  • non SU - Magnolia stamp, Carl daisy punches

On DD16's advice I have left the side panels as they are, as the card is so busy already - though I was tempted to put a honey pot on there.  I'm working on a nautical themed one now, as it's DH's birthday on Tuesday - so back soon with that one!

Thanks for calling in.

Cheers
Kez

Monday, January 20, 2014

Multi Flip Mini Album

In between various household duties and trying to keep cool in the heat over the past few days, I had a lot of fun making up a mini album suitable for anyone between 10 and 25. This one is destined for DD15 to put photos of her gang of friends in, but with a change of accent colours it could just as easily be for a boy instead.

I came across a wonderful video tutorial for making this album by Rachel Tessman (the link is here) and immediately had the idea for this bright, cheerful version. The dies from both flip card framelits and the new word bubbles framelits (in the upcoming Occasions catalogue) were the perfect embellishments.

The main disadvantage is my limited photography skills! Anyways, take a lookie. Here's the front cover with it all closed up, then a view from the top so you can see how neatly it all folds in.


And here are the two insides - the pieces of card are places for photos to be added.


Materials used:

  • stamps - Extreme Elements
  • card - Bermuda bay, crushed curry, strawberry slush, wisteria wonder, whisper white
  • other - circle flip card framelits, label flip card framelits, word bubbles framelits, chevron punch, strawberry slush ruffle stretch trim, timeless type alphabet dies, Big Shot, sticky strip, 2 1/2" circle punch, itty bitty punch (star)

You could make the album up and cut all the embellishments and give them separately too, so that the recipient could add them wherever they wish. The perfect gift for hard-to-buy-for-teens! Lol!

This project is my challenge entry at Just Add Ink this week; to use one of the flip card thinlits.

Thanks for stopping by.

Cheers
Kez

Sunday, November 3, 2013

Creative Crew November Challenges - Holiday Focus


For our holiday focus this month it's National Cake Day and we were given some photos to use as inspiration for our projects. I picked the one shown below because you know how much I love black and white/black and vanilla!


This made me think of weddings obviously, but also the scene from My Fair Lady when they are at the races and all the ladies are wearing black and white outfits and ginormous hats - here's some pics:


So I decided to make a hat box using black and vanilla papers, ribbons and embellishments. I kept it simple and elegant - here's how it turned out:


The Modern Medley papers are black and white, so I sponged them with very vanilla ink so that they matched the striped paper. I loved using the wide striped ribbon on the lid as it looks so much like the ribbon on Eliza's dress (above)!

Materials used:
  • stamps - None
  • card - basic black, Modern Medley dsp, (retired) Halloween dsp
  • other - very vanilla ink, sponge, gift bow die, very vintage designer buttons, (retired) striped grosgrain ribbon, sticky strip, (retired) black satin ribbon
  • non SU - hot glue gun, Mod Podge, paint brush, papier mache hat box from Spotlight

I had so much fun making this project and YOU can have just as much fun joining in the challenge and creating something for National Cake Day too! Why not pop over to the challenge gallery at Splitcoast and see what everyone else has made to inspire you? 

Thanks for calling in.

Cheers
Kez

Monday, February 21, 2011

Back To The Grindstone ...

DD18 is off back to Melbourne tomorrow for another year of hard slog at uni ... yeah, right!!! LOL! Anyway, she loves it down there and that is the most important thing, even though we miss her like crazy and I do wish she wasn't quite so far away ...

As I mentioned in my last post, she loved my little Ferrero Rocher suitcase so I offered to make her one for the journey - of course it helps that she's rather fond of chocolate too! Red and white polka dots are her fav at the moment, so I've used cherry cobbler with chocolate chip accents (sounds like a yummy dessert, doesn't it?!).


Naturally, I had to make a matching card and as I don't have an appropriate SU stamp, I thought Magnolia's Farewell Tilda was perfect. Once I had finished the card, I told her she couldn't have it as it's so darn cute that I didn't want to give it away, LOL! I did though, of course.


Hopefully the card and box will survive the journey and maybe sit in her college room to remind her of home ...

Cheers (and tears)
Kez