Showing posts with label poinsettia. Show all posts

Thursday, August 29, 2024

Joy

The good folks at the Color Throwdown challenge must really love this colour combo, as it's the third time this year they've given it to us to play with (see CTD785, CTD788) - but as I love it too, I'm certainly not complaining!


The summery vibe in the pic made me think Christmas (which is a summer event here Down Under), so I got out my inks and a stencil and got to playing.


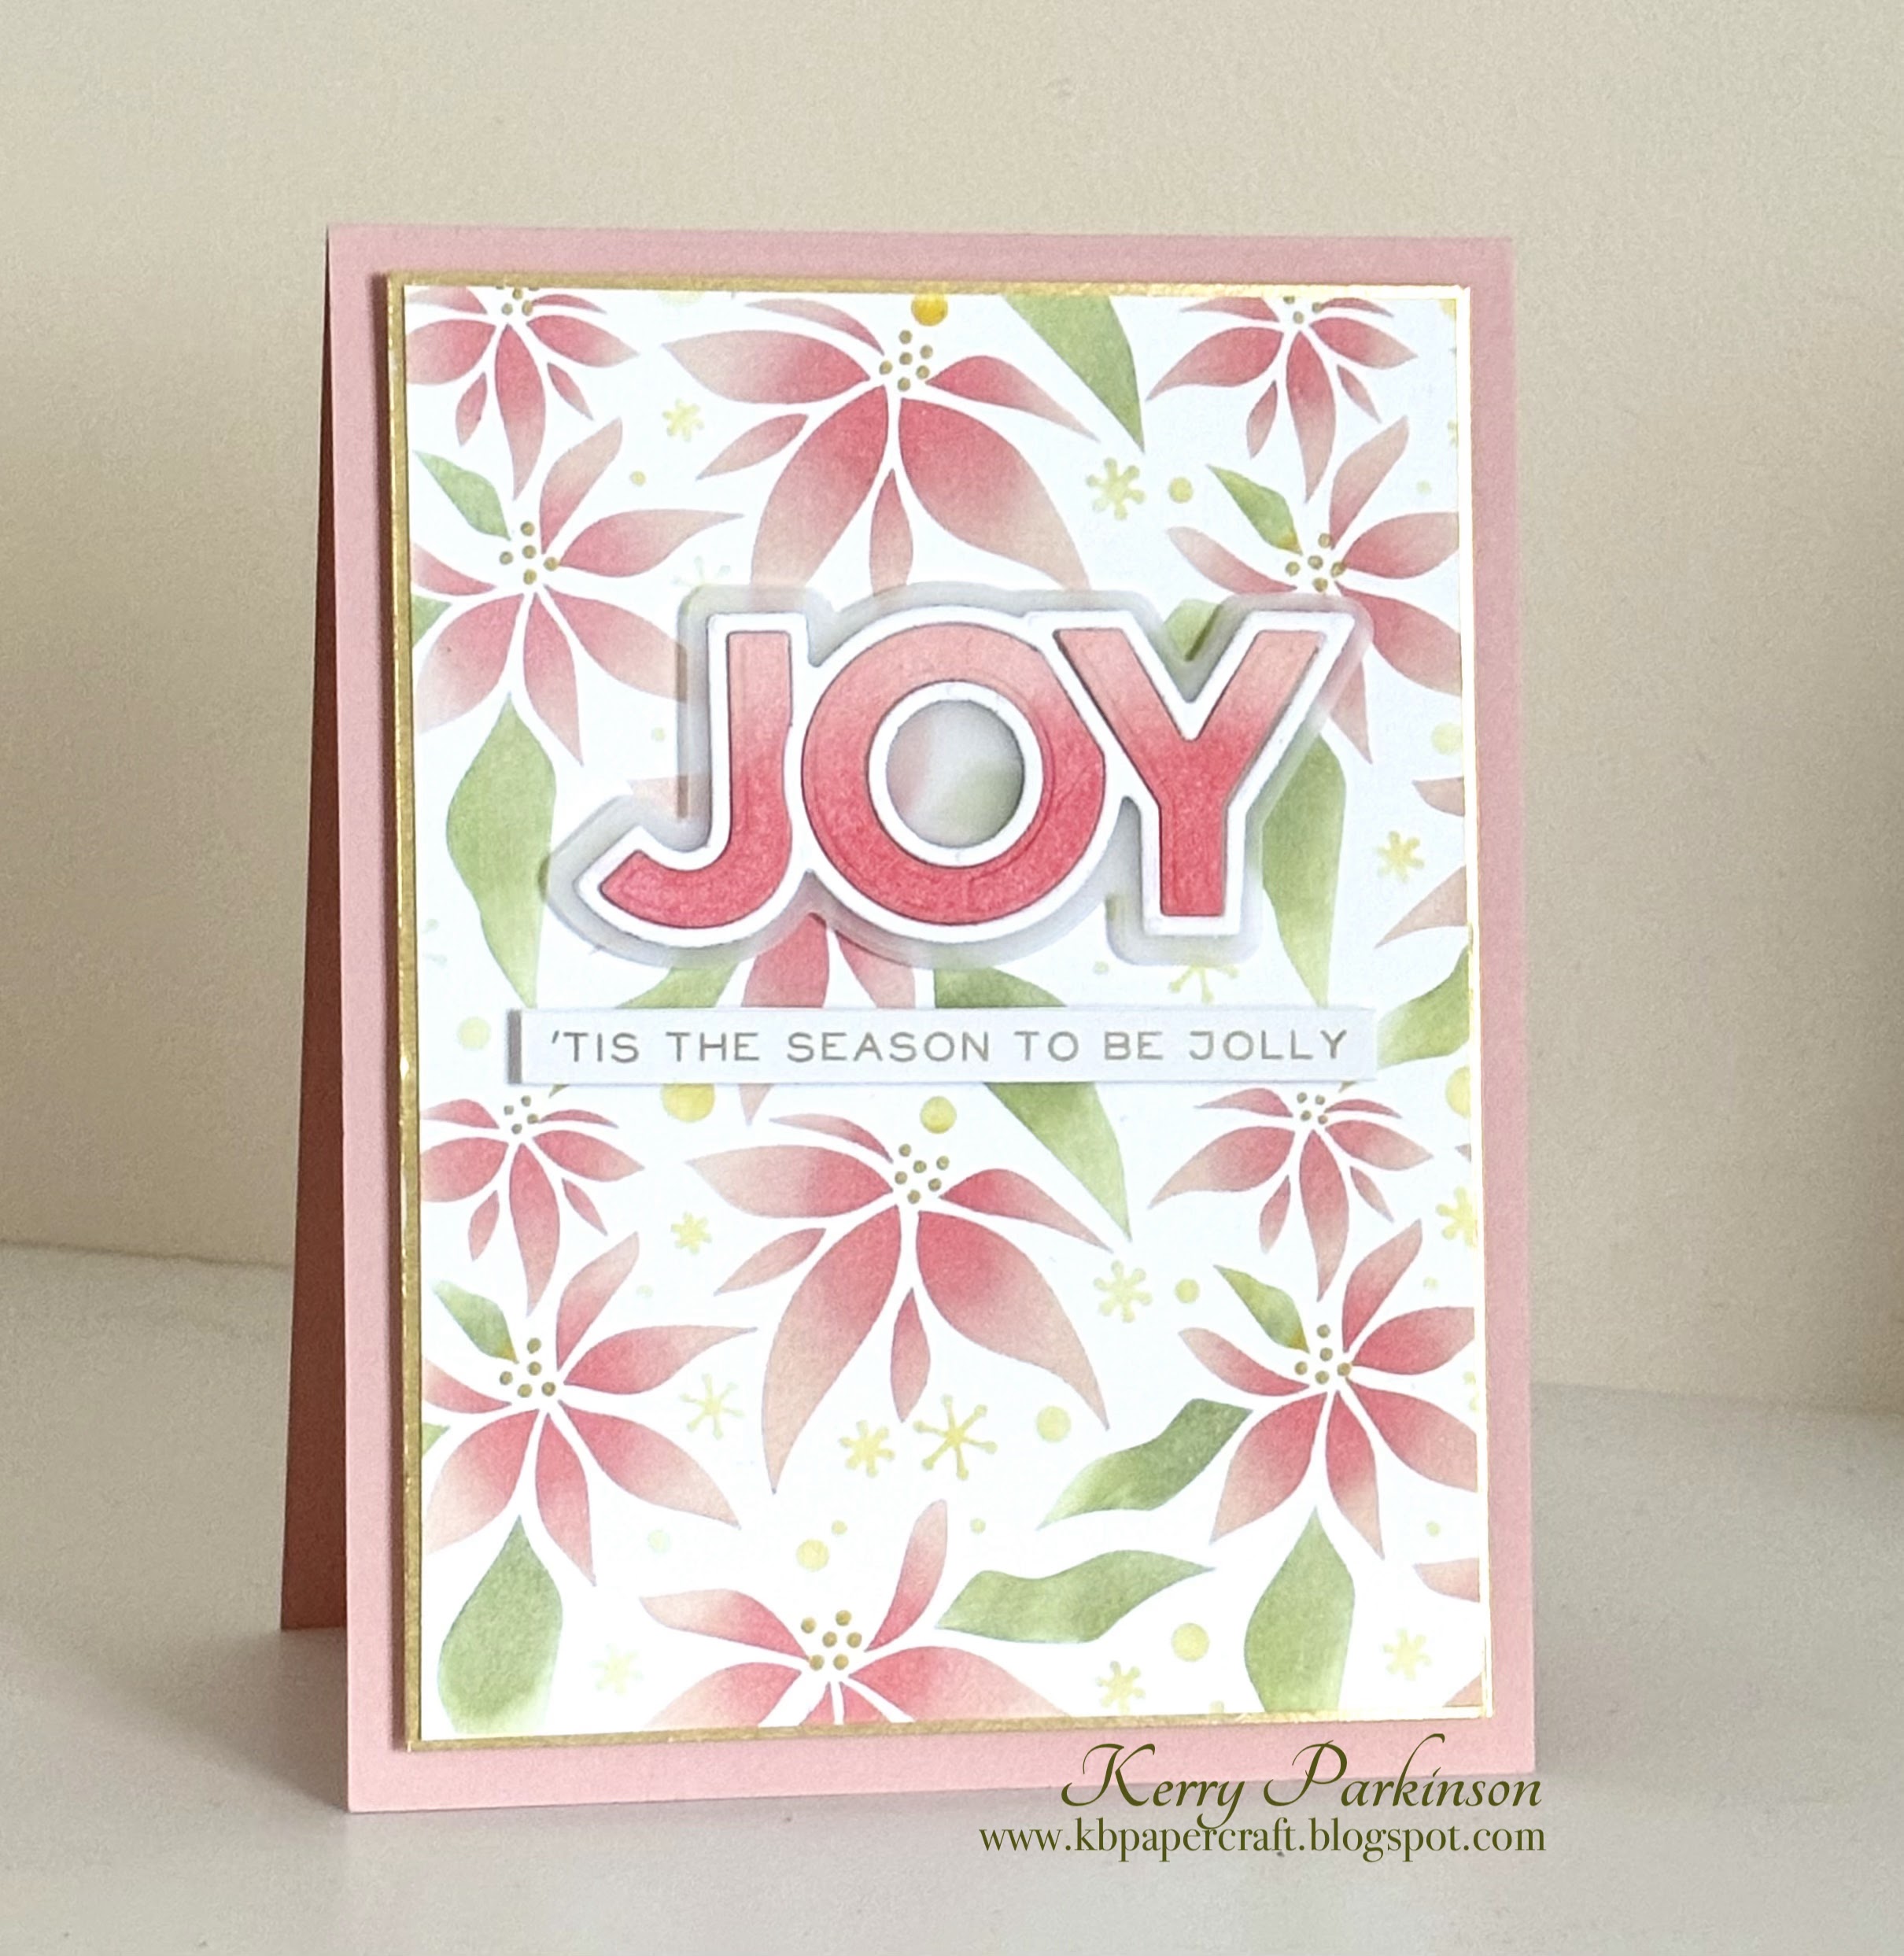
I blended two shades of pink on the flowers and added tiny touches of gold paint to the centres. The same colours were used for the inner pieces of the Joy die and I must say I am loving pink for Christmas! It's just a softer shade of traditional red and works so well with other seasonal colours. 

Materials used:
  • distress inks/oxides - tattered rose, worn lipstick, bundled sage, scattered straw
  • stencil - Poinsettia background (Waffle Flower)
  • card - watercolour, vellum, gold foil, pink
  • other - gold Posca pen, Dimensionals, blending brushes, Holiday Talk metallic sticker (Tim Holtz), Sidekick, Joy die, craft foam

It won't be long until we're all crafting Xmas goodies in earnest - where on earth does the time go? 

Thanks for calling in.

Cheers
Kerry

Wednesday, February 7, 2024

It's a Blackout!

For something just a wee bit different, today's card features a new-to-me technique called Blackout Embossing.  

I did encounter a problem straight away though - and that is most of my 3D embossing folders are texture patterns like brick, timber, weaving, etc, rather than a focal image. So I settled on Tim Holtz's gorgeous poinsettia and decided to use some non-Christmassy colours to hopefully make it look like just any old flower, lol. 


The technique is you emboss, then ink inside the debossed portion of the image (in this instance, flowers and leaves). Once that's done, use direct-to-paper with a dark coloured ink pad, in my case black. You have to be fairly lighthanded so it doesn't get in too much of the debossed areas but I must admit to also using a sponge applicator when my direct-to-paper didn't give me quite as much coverage as I wanted. I absolutely love that I ended up with this slightly patchy effect - it has so much more texture and character than an all-over smooth finish would have. I paired it with a gold foil die-cut sentiment and some gilded gems.

The end result is what I term a bit 'arty-farty' lol, but I rather like it. It's not grungy nor is it clean - kind of an in-between - and makes me think of a burned wood etching for some reason. I'd love to hear what you think.

Thanks for dropping by.

Cheers
Kerry

Friday, December 16, 2022

A Christmas Twofer

Today's card is for two challenges.


The colours in the CTD final challenge for the year are too pretty to not play with, don't you think? Then when I saw the sketch, an idea came to mind and ... well ... you know how that goes, lol. Here's my card:


I cut the baubles from coloured cardstock then stencilled with glittery texture paste, adding touches of paint once it was dry. It's rare for me to stick to a sketch so faithfully, lol, but this one was perfect for my elements. 

Materials used:
  • card - basic white, blushing bride, seaside spray, brushed gold
  • inks - blushing bride (SU), stormy sky oxide (Tim Holtz), golden glitz (Delicata)
  • other - glimmer paste (Nuvo), poinsettia stencil (TH), palette knife, tarnished brass distress paint, paintbrushes, sponge daubers, craft foam, Dimensionals, Holly flourish die (Memory Box), Holiday talk metallic stickers (TH), shaping mat and tool, Bauble nesting dies (Riverside Crafts)

Thanks for dropping in. 

Cheers
Kerry

Saturday, September 14, 2019

Filigree Fabulous

Browsing through Pinterest a week or so ago I came across a card by the extremely talented Kittie Caracciolo that set me thinking...fast forward to me borrowing a poinsettia die set from one of my lovely ladies...then after a very busy week I finally sat down and made the card I had envisioned.

Here tis, in all its vanilla and brushed gold glory:


Materials used:

  • stamps - Star of Light
  • card - very vanilla, brushed gold
  • dies - Delicate Lace edgelits, Pretty Pines thinlits, Sue Wilson Festive Collection - Classic Poinsettia and Filigree Poinsettia
  • other - embossing buddy, gold embossing powder, heat tool, Big Shot, Dimensionals, metallic pearls, shaping tool, shaping mat, precision plate

Love those delicate filigree petals. The brushed gold is very understated - it looks more like crumb cake in the photos!

And here's the card that inspired me. You can see they're similar yet very different - all it takes is that spark to set your creativity in motion. Whatever did we do before Pinterest? lol


Thanks for calling in.

Cheers
Kez