Monday, December 17, 2018

In Which My Opening Sentence Could Surprise

The only thing wrong with getting brand new crafting goodies - if I may be so bold as to suggest there could possibly be anything wrong with getting new stuff - is that ... no, wait, I think I need to amend that sentence. The only thing wrong with getting a bunch of new crafting goodies (cause I guess it's not really an issue if you only get one or two) is deciding which ones to play with first.

And then, of course, is the 'first try phenomenon'. By that I mean that you're so keen to just ink those stamps up or cut that ribbon/designer series paper that your first creation is not always...well, an important work of art, let's say. Not that I hate the cards I'm about to show you - no, no - it's just that they didn't come out as well in real life as they did in my head. Such is life, I guess. Maybe I could list that as the second thing wrong with getting brand new crafting goodies? Yeah, I hear you; I'd better stop there before I think of more things wrong and commit crafting sacrilege!

Alright, take a look at some new stuff:


Materials used:
  • stamps - Butterfly Gala
  • card - highland heather, whisper white, Gingham Gala DSP
  • other - Stampin' Blends, Big Shot, stitched seasons framelits, butterfly duet punch, glitter enamel dots, Dimensionals, edging dies (non SU)

This card uses products from the Gingham Gala suite - there's the stamp set, matching punch, gingham designer papers (in 5 colours), sequins and more. Plus, the upcoming Sale-a-bration catalogue also has matching butterfly designer paper AND ribbons to match the gingham papers. I'm not usually much into butterflies, but this suite was too lovely to resist.


Materials used:
  • stamps - Climbing Roses
  • card - petal pink, whisper white, smoky slate
  • inks - petal pink, smoky slate, mint macaron, basic grey
  • other - Stampin' Blends, scissors, Stamparatus, sponge daubers, distressing tool, Dimensionals

I do love me some distressing and sponging. A little bit of stamping-off softens background colours too.

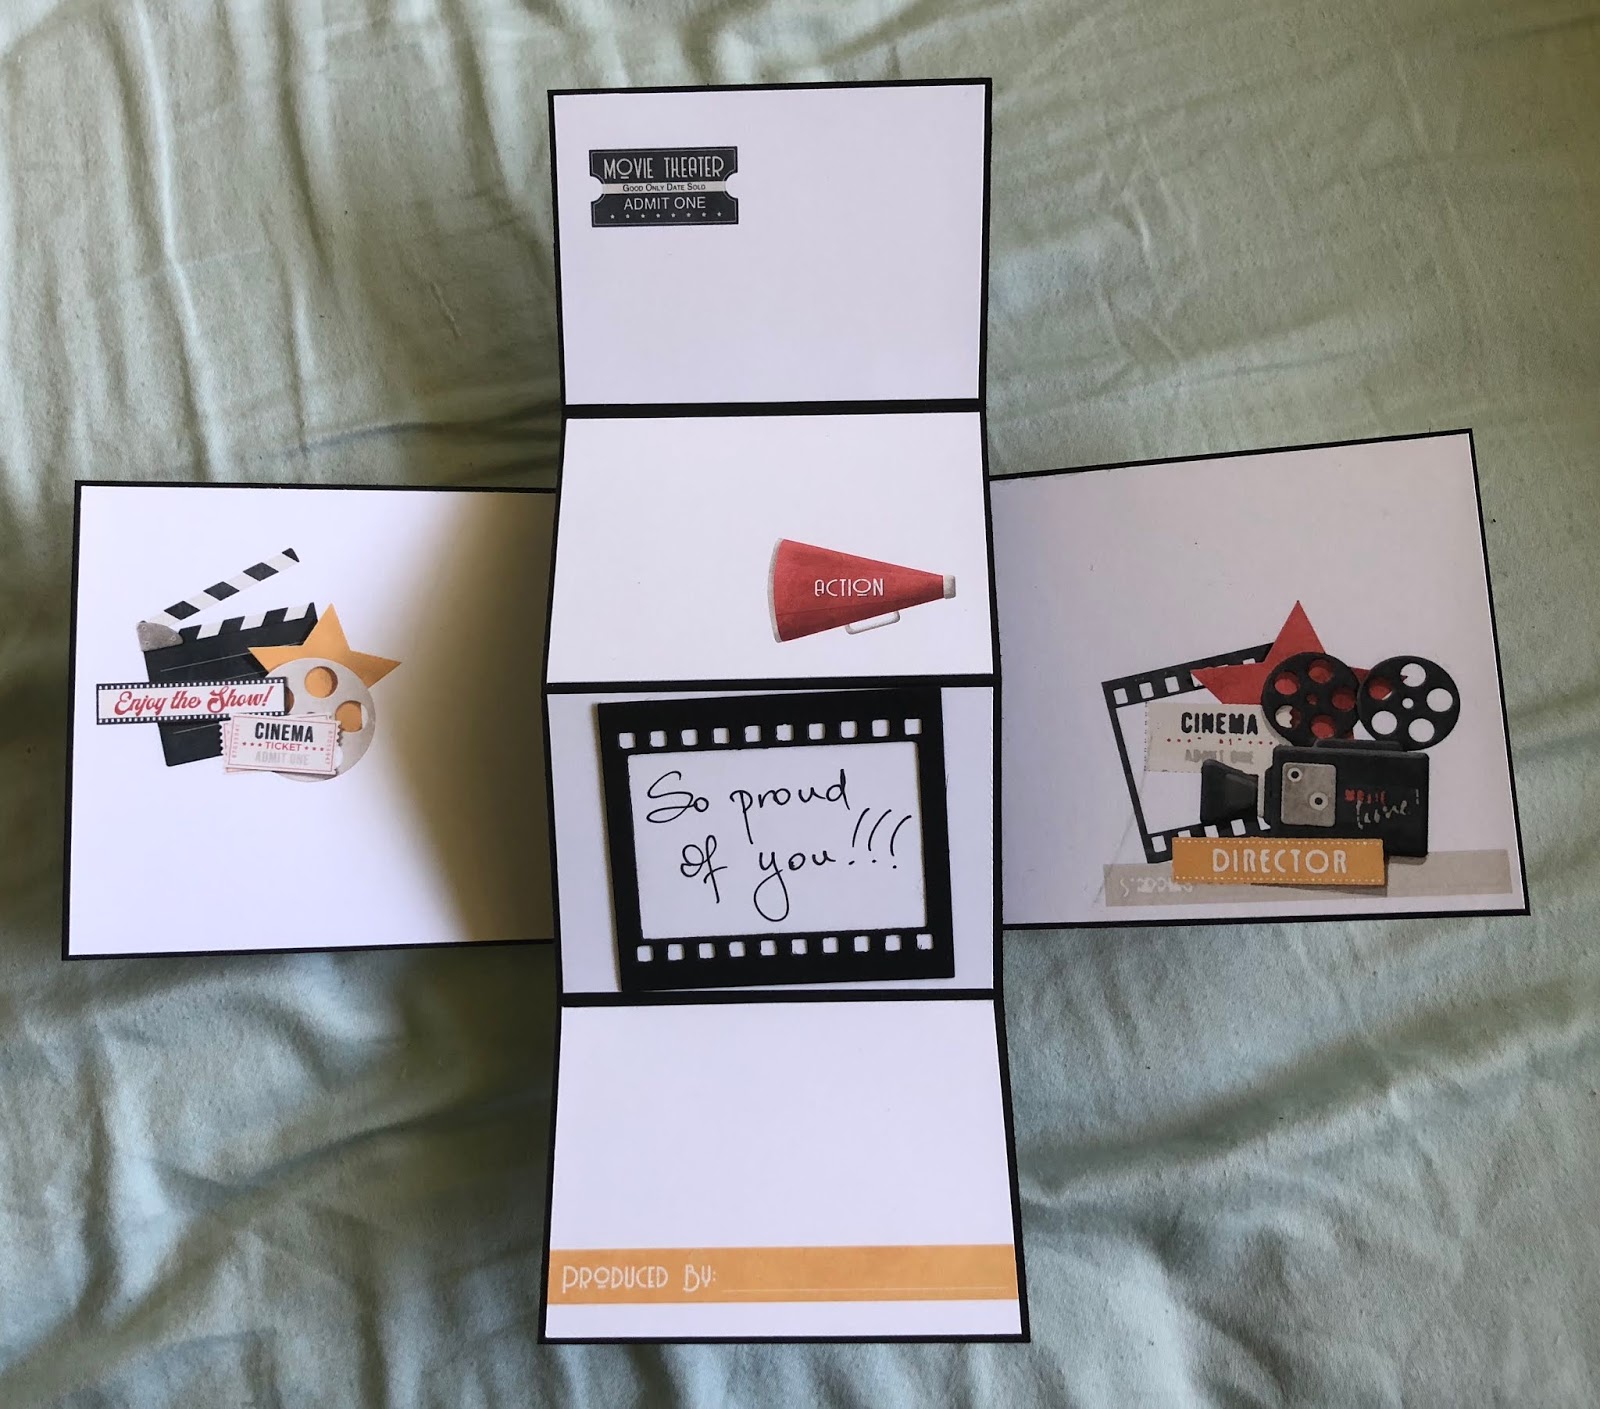
And I also have a bunch of not SU goodies and couldn't possibly neglect them, so here's how my first card with those turned out:


Are these little guys cute or what? The shimmer mist sunbeams look gorgeous when they catch the light too. I've done a video on the making of this card, so if you're interested pop on over to YouTube HERE. And if you like it, give me a thumbs up and subscribe so you'll get notified each time I put up a new video.

Materials used:
  • stamps - Gill Friends (My Favourite Things)
  • card - soft sky, basic black, whisper white
  • distress oxide inks - faded jeans, mermaid lagoon
  • other - embossing buddy, white embossing powder, heat tool, Big Shot, Gill Friends dies, Stampin' Blends, Dimensionals, clear epoxy shapes, white shimmer mist, sun ray stencil (MFT), paper towels, blending tool

So that's what I've been playing with - more to come (but maybe not until after Christmas). Thanks for stopping by.

Cheers
Kez

Saturday, December 8, 2018

Video! Video! Video!

Okay, this is only the second video I've ever made, so please be gentle with me, lol. It's funny how I can talk to myself quite frequently, but suddenly when you know it's being recorded it becomes a whole new ball game. I don't think I um and aah too much and just excuse the slight wobble at the very beginning.

Meanwhile, thanks to everyone who asked to see this - it's me showing you how I made my double display Dashing Deer Christmas card from this post. If you have any questions or there's something I don't make clear enough in the video, please email me (link over on the right somewhere) - BUT, having said that, no I do not know what all these measurements are in inches, but I know Google can tell you that info very easily.

Unfortunately Blogger couldn't load the video here, claiming it's too large a file, so I'll have to direct you to my YouTube page so you can watch it there. Click HERE.

Thanks for dropping in.

Cheers
Kez

Thursday, December 6, 2018

Christmas boxes

Each year when my class ladies and I have our annual Christmas Dinner at a local restaurant, I give them a craft challenge. It's been a tree decoration, item to wear, tags, etc in the past. This year they each had to make a small gift box a la 'Pootles', and I gave them a Christmas-scented candle to put in it. Here's a photo of the lovely decorated boxes they came up with:


Aren't they cute? Such a wonderful variety.

We had a lovely dinner together, as always, although it sadly brings another year of crafting together to an end. Our numbers have dwindled over the years, but we still get much pleasure, laughter and companionship from getting together to create and I am thankful to have the opportunity to share my crafting love with them.

Thanks for stopping by.

Cheers
Kez

Monday, December 3, 2018

Deer Oh Deer

SU's Dashing Deer and Joyous Noel speciality papers have been getting a real workout in my craft room lately as I've been busy with Christmas cards for various people.

Firstly I adapted the card I made recently for the Less is More challenge, simply adding two more layers. Here's how that turned out:


A little more involved is this double display card:


Here are some double gatefold cards which have a belly band to hold them shut. I had to make 10 of these, so there's a little variety.


And lastly a card a simple card that follows the sketch from the blog hop I took part in not so long ago. The wooden embellishment was stamped with Versamark and embossed with copper embossing powder to match the glints of copper on the papers.


Hopefully that's an end now to Christmas cards for this year. Having been designing and making them since July, I'm always well and truly over them by the time December comes around! I bet a few of you are nodding your heads and agreeing, am I right?

Materials used:

  • stamps - Dashing Deer, Stylish Christmas
  • card - grey granite, tranquil tide, whisper white, vellum, Joyous Noel DSP, copper foil
  • other - Festive Farmhouse elements, copper embossing powder, heat tool, Dimensionals, stitched circle framelits, Big Shot, stitched hills dies, double display card and layers dies (ODBD), extended Big Shot platform (non SU), Detailed Deer thinlits, Seasonal Layers thinlits, tailored tag punch, Stamparatus, Simply Scored, hills stencil (non SU), marker, copper washi tape


Thanks for dropping by.


Cheers
Kez

Monday, November 26, 2018

Serene Snow

How often do you make a one layer card? If your answer is 'practically never', then I say 'join the club' because I am usually all about the layers. So I was kinda surprised when the challenge over at Less is More caught my eye the other night and set my creative mind whirring.


It didn't take long for an idea to come to mind so I thought about it for a while before I went to bed. Then I thought about it some more once I was in bed (yeah, it's real conducive to sleep *she says sarcastically*) and again the next day. Eventually I sat at my craft desk to see if the idea would come together and I think it did. I'm quite happy with my result, anyway, and for me to be happy with only ONE layer is pretty much unprecedented, so yeah...break out the Toblerone (or Cadburys or Lindt...) 


And that's my second winter-themed Christmas card in two posts - looks like the drought is well and truly broken, lol.

Materials used:
  • stamps - Dashing Deer, Gorgeous Grunge, Stylish Christmas
  • card - very vanilla thick 
  • inks - soft suede, pool party, cherry cobbler, Versamark
  • other - clear embossing powder, white embossing powder, heat tool, embossing buddy, Stamparatus, Drifts and Hills stencil (MFT), sponge, sponge dauber, marker

I began with stamping the deer using my Stamparatus and soft suede ink, then overstamped with Versamark and clear embossed (this was so sponged ink wouldn't change their colour later). Then I stamped the snowfall in Versamark and white embossed, having masked my ground area with the stencil. Next came the sponging in pool party ink for the sky, then moving my stencil and sponging more snow drifts. Excess ink was wiped off all the embossed pieces with a tissue. Shadows were added with a marker and my sentiment was stamped last in cherry cobbler.

Have you challenged yourself lately to try something completely different to your usual style? 

Thanks for calling in.

Cheers
Kez

Friday, November 23, 2018

Double Front Dashing Deer

While I've been studiously avoiding a winter theme on purpose for my Christmas cards this year (the festive season falls smack-dab in the hottest months here in Australia), a snowy card was hard to pass up when I saw the inspiration challenge for this week over at Just Add Ink.


So here's what I came up with, a double front style card (design idea gleaned from Lisa Curcio).


Front 1:


Front 2:


Inside:


Navy and white always look so elegant together, I love them, and here with soft suede they're perfect.

Materials used:
  • stamps - Wonderland, Gorgeous Grunge, Dashing Deer
  • card - night of navy, whisper white, soft suede
  • inks - night of navy, soft suede, Versamark
  • other - Detailed Deer thinlits, Big Shot, white embossing powder, embossing buddy, heat tool, Sahara sand marker, stitched rectangle dies (Poppystamps), stitched hills dies (Poppystamps), Stamparatus

I'm toying with the idea of doing a video on how I made this card, so if that's something you'd like to see please leave a comment to that effect and if there's enough interest I'll do it.

Thanks for stopping by.

Cheers
Kez

Edited to add: Thrilled to have been picked for the challenge! Video made and uploaded at THIS LINK.

Wednesday, November 14, 2018

Stampers Anonymous November Blog Hop

Welcome to the Stampers Anonymous Team Blog Hop!

It's been an age since our last blog hop but we hope you will enjoy visiting each site to see what we've created for you. For this inaugural hop we had a sketch as our inspiration:


My three offerings not only have the sketch in common, but also all use the Buffalo Check background stamp. I've been having such fun with this amazingly versatile stamp!

First up is a soft baby card with some three-step stamping.


Materials used:
  • stamps - Buffalo Check, Baby Bear
  • card - soft sea foam, granny apple green, whisper white
  • inks - soft sea foam, granny apple green
  • other - Stamparatus, markers, ruler

Isn't that bear adorable? Makes me wish I had grand-babies to spoil!

Next is a fun little card I know one of my daughters will love to have. I angled my background and moved the sentiment panel a little to preserve the balance of the card. The coffee cup is covered with a die cut piece of acetate to give the look of those clear plastic cups they use for iced coffees, and I made my whipped cream from shimmery white embossing paste. It has tons of texture and looks amazing in real life.


Materials used:
  • stamps - Buffalo Check, Coffee Cafe
  • card - basic black, whisper white, daffodil delight
  • inks - daffodil delight, Memento tuxedo black, crushed curry
  • other - Stamparatus, shimmery white embossing paste, spatula, Coffee Cups framelits, Big Shot, Dimensionals, markers, ruler

For my third card I deconstructed the background a little, tilting again for added interest. The dog and bird were coloured with a blender pen and inks, then fussy cut and raised on my sentiment panel.


Materials used:
  • stamps - Bella and Friends, Itty Bitty Greetings, Buffalo Check
  • card - lemon lime twist, gorgeous grape, whisper white
  • inks - lemon lime twist, Memento tuxedo black, crumb cake, daffodil delight, poppy parade, gorgeous grape
  • other - circle dies, Big Shot, Stamparatus, Dimensionals, clear Wink of Stella, scissors, blender pen, gorgeous grape marker, ruler

Well, that's it from me; now click on one of the links below to be taken back or forward and see what the other ladies in the team have created for you. 

Thanks for stopping by.

Cheers
Kez


Friday, November 2, 2018

Merry Pines

Our team challenge this month is a Christmas card featuring predominantly green and white, though we can add in other colours. As I've been deep in Buffalo Check mode this week, I thought I'd have a go at a homespun card for the challenge.

I added touches of poppy parade and crumb cake with markers to make my tartan background, white embossed one of the wooden Festive Farmhouse elements, and roughed up my crumb cake frame with some uneven sponging. Pine leaves and a bow made from thick white baker's twine coloured using Stampin' Blends finish the decor.


I think my crumb cake marker needs re-inking or replacing; you can barely see it in these photos.

Materials used:
  • stamps - Buffalo Check
  • card - shaded spruce, crumb cake, poppy parade, whisper white, vellum
  • other - Pretty Pines thinlits, Big Shot, stitched rectangle framelit, white embossing powder, heat tool, mounting strips, mini glue dots, poppy parade Stampin' Blends, crumb cake marker, ruler, Tombow glue, thick white baker's twine, sponge dauber

I haven't used shaded spruce before, but it certainly is Christmassy, don't you think? Love how a touch of poppy parade brightens it up too. 

Thanks for popping in.

Cheers
Kez

Tuesday, October 30, 2018

That's A Wrap

DD20 finished her Bachelor's degree last week.

I know, right? ðŸ˜²

Where the heck those three years disappeared to, I just don't know.

Anyway, she went off to visit DD26 in Melbourne for a long weekend, which gave me the perfect opportunity to make a card without her seeing. Although her graduation ceremony won't be until next year, I thought the completion of all her hard work was what deserved recognition. As luck would have it, Nitwit Collections recently put out Silver Screen themed digital papers and elements, most of which are just right for my budding director/scriptwriter/producer. (I guess I should mention here that she did a Bachelor of Media, majoring in Sound and Screen Production, and plans to go on to a Masters in Directing or Producing)

Here's the twist and pop card I had a ton of fun putting together for her. The back cover has the same gold paper as the front.


Materials used:

  • card - basic black, whisper white, Silver Screen digital papers (Nitwit)
  • other - On Film thinlits (retired), Big Shot, computer and printer, poppy parade Stampin' Blends, black ribbon (stash), mounting tape, strong adhesive, mini glue dots

The black and gold colour combo is perfect because when her graduation does come around, the hood colour for her degree is gold. Serendipitous, don't you agree? 

If you haven't yet tried a twist and pop card, I encourage you to give it a go. Great fun and a huge wow for the recipient. For a link to the excellent tutorial I use click HERE.

Thanks for stopping by.

Cheers
Kez


Monday, October 8, 2018

Totes Adorbs

Is that still a thing? LOL. Well, anyway...

Something you may not know about me is that I love, love, love tartans. I don't wear them or use them terribly often, but I have always loved them and if you show me some DSP with a nice tartan, I have got to have it. Especially if you're gonna chuck some kerry cherry cobbler and very vanilla in there too!

So, when I saw a tartan bag on Pinterest, my immediate thought (after how gorgeous it is) was 'Ooo! I could make a paper tartan purse!' And today, I did. Let's call it a belated Happy World Card Making Day celebration (and bypass the fact it's not a card). Here tis,


Now, is that totes adorbs or what? (Nodding smugly, happy in the knowledge that it is, indeed, totally adorable and completely ignoring the pun because a bag is a tote, hehe.) Plus, it's the perfect size to hold a couple of choccies of the yummy variety, so...bonus!

Thanks for dropping by.

Cheers
Kez

PS Oops! My bad! I forgot to put the list of materials. Hope that helps Linda K (and thanks for your comment love).

Materials used:
  • card - basic black, Festive Farmhouse DSP
  • other - petite purse die (retired), satin ribbon bow (purchased, brand unknown), 3mm strong adhesive, bone folder, Big Shot, Dimensionals


Monday, October 1, 2018

Does It Feel Like a Decade?

Today I've been a Stampin' Up! demonstrator for ten years.

A decade.

And you know how it goes - it feels like it went by really quickly yet very slowly at the same time. It's kind of hard to imagine there was a time when I wasn't involved with SU, though I can clearly recall my early forays into card making and certainly rubber stamping.

The best part of the last ten years is most definitely, for me, the making of friendships. It's a testament to human nature how easily we bond over common interests and it is a constant joy to me to get together with a group of people and enjoy the pleasure of creating. I'm lucky enough to have in my life my crafty demo friends, the amazing group of women who have been coming to my card classes for a huge portion of those ten years, the wonderful ladies who attend my stamp camps year after year, and of course, you. Yes you, especially if you didn't just pop in here by chance, but are a regular visitor. Sure, I like creating on my own, but I gain much more enjoyment when sharing it with others, and I am very grateful to Stampin' Up! for having brought that fulfilment to my life.

So thanks, SU, for the last ten years, and thanks also to all the crafty people in my life who have shared those ten years with me. Here's to many more.

And, well - naturally - I made a card. An anniversary card to myself, I suppose. When I thought about the kind of card I wanted to make I immediately decided on one of my all time favourite techniques, so I wiped the dust motes off my brayers and got to work. Here's what happened:


Materials used:

  • stamps - Enjoy Life
  • card - whisper white, basic black, mango melody
  • inks - daffodil delight, crushed curry, mango melody, calypso coral, balmy blue, Versamark
  • other - Stamparatus, brayer, 1 3/8" circle punch, post it note, white embossing powder, heat tool, black embossing powder

A message we should all take note of, isn't it? To enjoy life. We only get one, after all. So get out there today and do something that brings you pleasure, whatever that may be, and kick some metaphorical butt!

Thanks for stopping by.

Cheers
Kez

Sunday, September 23, 2018

Monthly Christmas Cheer

Our Christmas stamp-a-stack cards for this month are a mix of old and new as well as dark, dramatic tones and light, elegant hues.

Here's our first:


I cut a window from crumb cake, embossed it with Subtle for some texture, then stamped and white embossed the sentiment. Behind that is some of the lovely Twinkle, Twinkle DSP and a Bethlehem die. Add the shepherd and a glittery star, and voila! Isn't that paper amazing? I love the soft swirls that look so realistic.

Materials used:

  • stamps - Night in Bethlehem, Star of Light
  • dies - Bethlehem edgelits, rectangle framelit
  • card - night of navy, crumb cake, whisper white, white glitter, Twinkle, Twinkle DSP
  • other - Subtle embossing folder, Big Shot, Dimensionals, sponge dauber, glue


And our second card uses classic colours of cherry cobbler, vanilla and gold.


Here I've use the Tufted embossing folder, then lightly distressed the edges and outlined them with gold embossing powder. Gold foil leaves and gold pearls give the poinsettia some contrast and the stitched framelit goes perfectly with the quilted look.

Materials used:
  • stamps - Stylish Christmas
  • dies - Stitched Seasons framelits
  • card - very vanilla, gold foil
  • other - embossing buddy, Tufted embossing folder, Big Shot, Dimensionals, gold pearls, glue, scissors

It's hard to believe there's only one more stamp-a-stack class left. Christmas is coming waaaaaay too fast!

Thanks for calling in.

Cheers
Kerry


Sunday, September 9, 2018

I'm Baaaaaack!

Howdy doodly! I'm back in Oz after two weeks away and ten lovely days spent on our new-to-us boat in France. The weather was warm and sunny pretty much every day, so it's a bit of a shock to be back wearing a jumper again, I gotta tell ya!

Here's some pics for you of our sojourn; firstly DH and I on board. I'm out in the cockpit while he's in the galley (yep, he did indeed cook a few meals and do some dishes!)


 Here's DH standing proudly in possession


A couple of shots of Pornic


This one is my fav; I captured the sunset over the starboard bow on my last night


And if there's any other Star Wars geeks out there, you might appreciate what tickled my fancy about this sign I saw on some robotic toys at the duty free shop in Dubai International Airport


LOL

So, I have made a couple of cards since my return, but they're for upcoming Christmas stamp-a-stack classes, so I'll post them at a later date. Meanwhile, I hope you're enjoying the gorgeous goodies in the new Holiday Catalogue and look forward to browsing around some blogs to see what everyone's doing with them.

Thanks for calling in.

Cheers
Kez

Tuesday, August 21, 2018

Going Offline and Off On Holiday

Bonjour! Comment ca va?

Okay, pardon my French, but I'm getting excited because tomorrow I'm off to France! Yes, we are finally going to take ownership of our yacht; she's currently berthed in a place called Pornic, which is in western France on the Bay of Biscay, just where the Loire river reaches the ocean.


I'm flying to Paris and having a couple of nights there before catching a train to Pornic, where hubby will meet me (he's in the Netherlands on business at the moment) and we'll get to see our boat 'in the flesh' for the first time. Excited much? Oh yeah. Mind you, it's been a good thirty-mumble-something years (ahem) since I flew to the other side of the globe, so I'm not particularly looking forward to being squished in a seat for 24 hours, but hey! totally worth it.

While I'm away, internet connection is likely to be sketchy - we don't know what facilities the marina has - so I doubt I'll be posting much, if at all. Needless to say I won't be doing any card making, lol. Rest assured, though, I'll catch you up once I get back Down Under. So while I'm gone, stay safe and happy crafting.

Cheers
Kez

Friday, August 17, 2018

You Can Help Save Christmas

Well, okay, not save Christmas literally, but help me out with a Christmas dilemma!

Here's the scoop: I recently bought SU's lovely 'Stylish Christmas' stamp set, wanting to use it for my next month's stamp-a-stack class. I had an eclipse design in mind and was reasonably happy with the finished card. Here tis:


Materials used:
  • stamps - Stylish Christmas
  • card - merry merlot, mossy meadow, very vanilla
  • inks - merry merlot, mossy meadow
  • other - PEACE die-namics die (MFT), crystalina Kindy Glitz, mounting strips, Big Shot


Then I came across a card by Shelly Godby which I loved and wanted to try out - it uses the utterly stunning Tufted deep embossing folder, so really, how could I resist? Here's my version of her card:


Materials used:
  • stamps - Stylish Christmas
  • card - shaded spruce, whisper white, gold foil
  • inks - merry merlot, shaded spruce, pool party
  • other - Dimensionals, scissors, Stamparatus, Tufted embossing folder, Big Shot, gold rhinestones


My dilemma is that now I can't decide which card to use for the class! We can't do both because there's only one stamp set to be shared among five ladies making five cards each. It just isn't feasible. And I know we could do one next month and one the month after, but I still need to decide which! Sooooo, help me out here! Leave me a comment telling me which you prefer and why (and it would be really helpful if my class ladies did this too!) to make it easier for me to pick.

Thanks in advance for your help and thanks for stopping by.

Cheers
Kez

Thursday, August 16, 2018

#IBlameItOnJennifer

I've said it before and I'll say it again - Jennifer McGuire is an enabler! LOL.

She's also one very talented lady and if you don't already subscribe to her YouTube channel, I thoroughly recommend you do. It was one of her excellent videos that alerted me to the myriad of ways you can use 3D embossing folders.

Here's my attempt at CASEing one of hers:


Materials used:
  • stamps - none
  • card - whisper white, soft sea foam
  • inks - soft sea foam, garden green
  • other - subtle embossing folder, Big Shot, frame dies (stash), brayer, Tim Holtz 3D texture embossing folder 'Botanical', mounting tape

I inked up the inside of my embossing folder before running it through the Big Shot, then ran a brayer very lightly over the top of my embossed piece with a darker ink.

And here's another one: 


This folder isn't quite as deep as the Tim Holtz one so my background ink is slightly patchy, but I like to think it adds to the effect (well, that's what I'm going to tell myself, lol). I've deliberately left the sentiment at 'Happy' as I like to think it could be for a number of uses - happy birthday, happy for you, you make me happy, etc - the rest can be added inside. You're limited only by your imagination! 

Not my best photos, sorry. However, are you loving SU's Subtle embossing folder as much as I am? It gives great texture to your backgrounds and lives up to its name perfectly.

Materials used:
  • stamps - none
  • card - daffodil delight, basic grey, whisper white
  • inks - daffodil delight
  • other - happy die (Altenew), Sizzix 3D embossing folder 'Floral Blossom', Big Shot, stitched rectangle framelits, mounting tape, mini glue dots, metallics sequin assortment, subtle embossing folder

You can watch Jennifer's video HERE on creative uses of embossing folders. If you're like me, you'll soon be ordering some 3D goodies to play with!

Thanks for stopping by.

Cheers
Kez


Saturday, August 11, 2018

Thankful, Blessed and a Wee Bit Red-faced

Thank you so much to everyone who left comments on my last post, I really appreciate them. After receiving an email from Phyllis, who was having trouble leaving remarks, I went in to my blogspot settings.

Now, years ago I set up my settings to notify me of comments (via email) for verification, after a rash of spam comments cropped up. I haven't ever changed those settings and I did used to receive emails each and every time someone left a comment, which I would then publish.

However, I discovered today that for some unknown reason I have not been receiving those notifications and there were a flurry of unpublished comments waiting for me! So, to those of you who have attempted to leave a kind word or two, I humbly apologise. Hopefully you'll now see that those are now visible. If you still have trouble, please send me an email (the link is over on the right) to let me know so I can investigate what's going on! And thanks to Phyllis for alerting me to the problem.

That said, I kept my word and did a round of comment-leaving myself, even following links from cards I've pinned from Pinterest and leaving some love for those creative folks who put their beautiful cards out there for us to see. I'll endeavour to keep making that small contact with people who inspire me with their ingenuity and encourage you to do the same, knowing from experience how much a kind word can inspire and enthuse - as well, of course, as simply making you feel good.

I've got more lovely cards to show you but it's too late in the day now for photography, so that will have to wait, probably until Monday as I have a class tomorrow. Hope to welcome you back then - and don't forget the new buttons you can click on for a quick and painless way to leave feedback.

Thanks for dropping in.

Cheers
Kez


Friday, August 10, 2018

Cat Got Your Tongue? Or...fingers?

In this digital age where we're all so isolated, geographically, from each other, it's easy to lose the personal touch as well. For me and many thousands of others who 'put ourselves out there' by expressing our emotions, thoughts and feelings on a virtual page such as this, it can feel like a thankless task when you get absolutely no response from your 'audience'.

You see, it's difficult not to notice that so many of my recent posts have received no comments at all, and even a smattering of comments earlier were from my bestie alone. It used to be that there'd be a few comments of support, and that small amount of feedback nourishes the creative part of me and gives me incentive to create more. Honestly.

And I get it, I really do. I browse blogs as well and I don't always leave a comment. Sometimes the blogging platform itself makes that difficult if you have to 'sign up' to say anything. Sooooo, if an effort to make it easier for you, I've added some tick boxes at the end of each bog post - now all you have to do is simply click your mouse in one of the boxes and I'll get an idea of how much you like the card/s. But if you feel like leaving just a short message - even just to say hi from your corner of the globe - that would be wonderful and truly appreciated. In fact, why not resolve for just one day this week, this month, whatever, to leave a short comment on each and every blog you visit. You'll feel better for having reached out, won't you? For connecting with another human, even though you may never meet. And the blog owner will most definitely feel better, this I can say with complete and utter confidence.

In fact, I'm going to go blog hopping right now and spread some comment love as I go...

Here's a card to give you something to inspire box-ticking. You can even keep scrolling down and tick boxes for previous posts too - isn't technology clever?


Thanks for stopping by.

Cheers
Kez

Thursday, August 9, 2018

At the Crack of Dawn

Thursdays mean an early start for DD20; it takes about 2 hours for her to make the train and bus commute to uni in Sydney from the mountains, so this morning we were both up before the winter sun. As I was driving home again, I was treated to a stunningly gorgeous orange and yellow sunrise which made my fingers itch to get out my distress oxides.

My card is certainly no match for the beautiful vista that was laid before me, but I love it nonetheless.


Materials used:

  • stamps - Wonderland
  • card - whisper white, basic black, so saffron
  • distress oxide inks - antique linen, squeezed lemonade, spiced marmalade, fired brick, black soot
  • other - post it note, 32mm (1 1/4") circle punch, blending tool, mounting tape

I've kept it simple because, really, Mother Nature often needs no adornment. I hope the sunrise was as beautiful where you are. Thanks for dropping by.

Cheers
Kez