At Just Add Ink this week we have a sketch to challenge you.
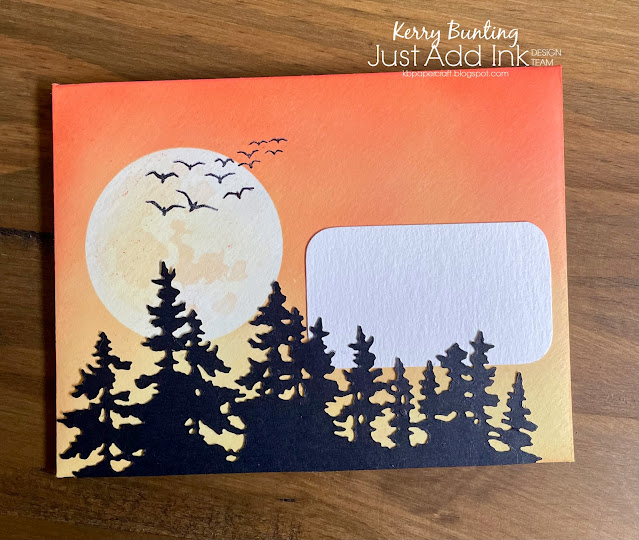
When you've gone to the effort to hand make a card for someone, it's often nice to stamp a little on the envelope as well. But you can take that a step further and make the envelope an integral part of the art you create. Did you know mail/envelope art is a thing? (Give it a Pinterest search, you'll be amazed.) So when this sketch immediately made me think of the back of an envelope, I couldn't get the idea of envelope art out of my head - and you know what happens then, lol. It lingers and pesters and won't go away until I sit down at my craft desk to see if my idea will actually work...
Here's the back of my envelope (made from watercolour paper).
I continued the design to the inside section too (well, only the bit that shows, lol).
And here's the front.
I used stamps for the trees on the back but a die for the front, as I did the sun/moon higher up and the die is a bit taller. The whole thing has been sprayed with fixative so nothing can happen to smudge the inks. I added an area for the addressee's details so I wouldn't have to use a special marker (to write over the fixative) but now I think I need to brush up on my calligraphy skills so the name and address will look as good as the rest!
Materials used:
- stamps - Treeline (Tim Holtz), Birds (Lavinia Stamps)
- card - watercolour, basic black
- distress oxide inks - scattered straw, dried marigold, ripe persimmon
- other - corner rounder punch, Stamparatus, blending brushes, distress micro glaze, moon mask (TH), black soot archival ink, Treeline die (TH), workable fixative spray


3 comments:
Oh my goodness! Your envelope is incredible! You are so amazing to even carry the artwork through to the inside. WOW!
I totally agree - this is a stunning project. I think it's too good to put in the post! I love it!
LOVE this Kerry! You are always so creative and inspiring...Awesome use of the sketch!xx
Post a Comment