Showing posts with label Lavinia stamps. Show all posts

Friday, September 8, 2023

JAI#669 - Just Add a Colour Combo

It's time for another Just Add Ink challenge and this week we have a colour combo for you to play with using three of Stampin' Up's neutral colour family. If you don't have SU inks, just use whatever you have that is a close match.

Sympathy cards are never nice to need but helpful to have on hand, so I made what I hope is a quiet and peaceful card.

I began with the sky area using misty moonlight. I decided I didn't want just a plain ink blend, though I did begin with that as my first step. Then I added a little watercolour brushing followed by ink smooshing, drying in between each application of colour, until I felt it was a little misty and mysterious. One of those skies you can gaze at for ages finding shapes and oddities, you know? Next came stamping the forest and it's all done with just one tree stamp. I began with first generation stamping using mossy meadow ink, then moved on to second generation stamping. I gave it a little water to get a bit of a softer, watercolour effect and dried it before adding more green trees, then stamping in black along the front. Using darker tones at the front, medium tones in the middle and lighter tones at the back gives great depth. Once I was happy with that I stamped the birds, masking off some of the stamp as I didn't want some larger birds that were on it. A coat of distress glaze went over everything to protect it before it was matted and mounted and my last step was to add the sentiment strip. 

Materials used:
  • stamps - Fir tree 1, Birds (both Lavinia), Itty Bitty Greetings (Stampin' Up)
  • card - crumb cake, basic black, watercolour
  • other - masking paper, 1 1/4" circle punch, blending brush, water spritzer, heat tool, MISTI, Dimensionals, craft foam, sponge dauber, paintbrush, white embossing powder

I do hope you'll visit the Just Add Ink blog to see how my fellow team mates used these colours, and even be inspired to create and join us. Thanks for calling in.

Cheers
Kerry

Friday, July 14, 2023

JAI#661 - Just Add Inspiration

Welcome back to a new challenge at Just Add Ink! This week we've an inspiration pic for you that could perhaps get you in the mood for Christmas (it's closer than you think, lol).


Here's how I was inspired.


Materials used:
  • stamps - Leaf Creeper, Silhouette Grass (both Lavinia)
  • card - basic white, crumb cake, watercolour, Wonderful Christmastime junk journal (The Journal Boat)
  • Tim Holtz dies - Darling Deer, Vintage Tidings
  • other dies - Essential Arches (Spellbinders)
  • other - picket fence, frayed burlap and tarnished brass distress paints, paintbrushes, Big Shot, craft foam, sponge dauber, Holiday Talk metallic stickers (Tim Holtz), crumb cake and vintage photo inks, Dimensionals, distressing tool 

I was interested to discover the origins of the Christmas in July tradition here in Australia - apparently it's attributed to some Irish tourists who were visiting the Blue Mountains in July (which of course is summer time in Ireland but winter here) and, thrilled to see snow and reminded of Christmases 'back home',  persuaded a local hotel owner to hold a "yulefest" party. The idea caught on and here we are!

There's plenty more inspiration to see over on the Just Add Ink blog.

Thanks for stopping by.

Cheers
Kerry

Friday, June 9, 2023

JAI#656 - Just Add Inspiration


Welcome! It's not my week over at Just Add Ink Challenges, but I simply couldn't resist this stunning image and the idea it sparked it my head, so I'm joining in with a card for you.


I began with stamping the fairy image using black ink and clear embossing powder, then sponged on the peach ink and added my moon mask. More ink blending with blue and purple, followed by stamping the trailing leaves in black, blue and purple. Love the touch of sparkle? Holographic glitter for the win! 😁 This stuff is gorgeous but photos don't do it justice, unfortunately. 

Materials used:
  • stamps - Rue, Leaf Creeper (both Lavinia)
  • card - basic white
  • distress inks - saltwater taffy, prize ribbon, villainous potion
  • other - blending tool, blending brushes, moon mask (Tim Holtz), MISTI, clear embossing powder, heat tool, craft foam, StarBrights holographic glitter (Lavinia), sponge dauber, Versafine Clair nocturne and twilight inks

I hope you'll pop over to the JAI blog to see more samples to inspire you to create. Thanks for stopping by.

Cheers
Kerry

Monday, April 10, 2023

Pipin and the Fairy

In the mood for playing, I got out some inks and Lavinia stamps and ended up with this card:


I stamped Pipin the rabbit and the fairy first (using permanent ink) to ascertain placement for my ground and moon. The moon mask went down and I tore some scrap paper for the ground before beginning my blending with distress oxide inks. Once all the inking was done and dry, I stamped the images again and added some holographic glitter to the 'magic' sprinkles. As I was assembling the card I decided it needed something more, so I whisked out a stencil and without re-inking my blending brush, added a touch of interest and texture which I think finishes the card off perfectly. It was quick and easy and so much fun and I am loving these colours together!

Materials used:
  • Lavinia stamps - Stars 1 mini, Pipin mini, The Fairy Foragers, Silhouette Foliage
  • card - Multifarious smooth (Lavinia), basic black and basic white (SU)
  • distress oxide inks - dusty concord, saltwater taffy, villainous potion
  • other - moon mask (Tim Holtz), Versafine Clair nocturne ink, Quickie glue pen, holographic glitter (Lavinia), blending brushes, sponge dauber, MISTI, scrap paper, Pods stencil (Lavinia), craft foam

Thanks for calling in.

Cheers
Kerry 

Thursday, March 16, 2023

The Card Concept challenge #191

It's the second challenge of the month with The Card Concept so we have two mood boards for you to draw inspiration from, named Signs of Spring and Butterfly Blues.


My inspiration came from the flower and butterfly in option b and colours from both palettes (namely navy, yellow and turquoise).


I began by ink blending my background beginning with salvaged patina, ensuring it was lighter towards the middle. Then I placed my first moon mask and added chipped sapphire blending followed by night of navy. With the moon mask still in place, I added a little extra ink around the outside then blended on the second layer of the mask. After stamping the main images (fairy, flowers and butterfly) I used a wet waterbrush to remove some of the oxide ink from inside petals and wings, then coloured them using Copic markers. The next step was the foliage at the bottom which used first, second and third generation stamping to create depth. Lastly I added hints of white gel pen and some shimmer to all the wings.

Materials used:
  • Lavinia stamps - willow, slender mushrooms mini, fairy bugs, Mae
  • card - basic white, Bermuda bay
  • Copics - Y02, Y11, BG11, BG32
  • distress oxide inks - black soot, salvaged patina, chipped sapphire
  • other - night of navy ink (SU), clear embossing powder, heat tool, MISTI, waterbrush, moon mask (Tim Holtz), blending brushes, craft foam, stitched rectangle die (Paper Rose), Big Shot, white gel pen, clear Wink of Stella, distress micro glaze

Do check out how the challenge graphics inspired my fellow team mates by heading over to The Card Concept blog, and thanks for calling in.

Cheers
Kerry 

Friday, January 27, 2023

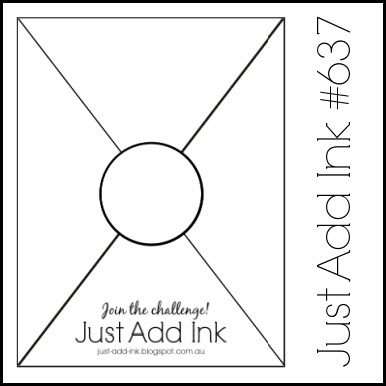
JAI#637 - Just Add a Sketch

At Just Add Ink this week we have a sketch to challenge you.

When you've gone to the effort to hand make a card for someone, it's often nice to stamp a little on the envelope as well. But you can take that a step further and make the envelope an integral part of the art you create. Did you know mail/envelope art is a thing? (Give it a Pinterest search, you'll be amazed.) So when this sketch immediately made me think of the back of an envelope, I couldn't get the idea of envelope art out of my head - and you know what happens then, lol. It lingers and pesters and won't go away until I sit down at my craft desk to see if my idea will actually work...

Here's the back of my envelope (made from watercolour paper).

I continued the design to the inside section too (well, only the bit that shows, lol).

And here's the front.

I used stamps for the trees on the back but a die for the front, as I did the sun/moon higher up and the die is a bit taller. The whole thing has been sprayed with fixative so nothing can happen to smudge the inks. I added an area for the addressee's details so I wouldn't have to use a special marker (to write over the fixative) but now I think I need to brush up on my calligraphy skills so the name and address will look as good as the rest!

Materials used:

  • stamps - Treeline (Tim Holtz), Birds (Lavinia Stamps)
  • card - watercolour, basic black
  • distress oxide inks - scattered straw, dried marigold, ripe persimmon
  • other - corner rounder punch, Stamparatus, blending brushes, distress micro glaze, moon mask (TH), black soot archival ink, Treeline die (TH), workable fixative spray

Do head on over to the JAI blog to see what my fellow team mates did with this sketch, and thanks for stopping by.

Cheers
Kerry